Connect to GitHub:
Since we are using a GitOps approach, we will need to install and connect FluxV2 to a GitHub repository.
GitHub Personal Access Token
info
If you don't have one token yet, check the Creating a personal access token guide.
caution
Remember to use the GitHub legacy tokens
export GITHUB_TOKEN=<your-token>
export GITHUB_USER=<your-username>
export GIT_BRANCH=main
echo "export GITHUB_TOKEN=${GITHUB_TOKEN}" | tee -a ~/.bash_profile
echo "export GITHUB_USER=${GITHUB_USER}" | tee -a ~/.bash_profile
echo "export GIT_BRANCH=${GIT_BRANCH}" | tee -a ~/.bash_profile
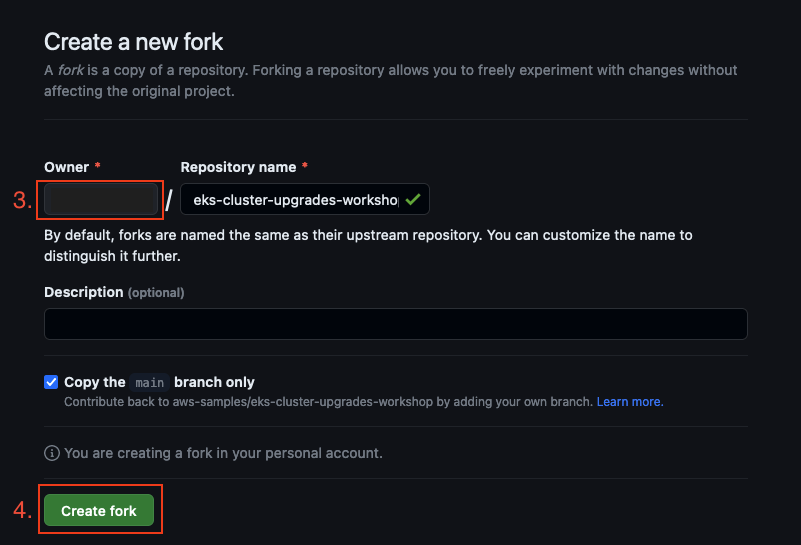
Create a fork of this repo in your GitHub account.

Execute install.sh script
Now go back to your Cloud9 IDE and execute the install.sh script present on /home/ec2-user/environment folder.
cd /home/ec2-user/environment && bash install.sh
Fill all the asked questions, and when it asks your for terraform state, make sure to point to the following path /home/ec2-user/environment/terraform.tfstate, see example below.
Enter the tf_state path (leave blank to generate infrastructure from scratch): /home/ec2-user/environment/terraform.tfstate
After this, the script will initialize and install FluxV2 in your cluster pointing to your forked GitHub repository defined earlier. If everything succeeded, you should see the following output.
Now proceed to flux module